no carve diy pumpkins

We started searching for no carve pumpkin decorating ideas when our kids were very young, but even now that they are older they love finding fun new ways to decorate pumpkins. Anything colorful or silly is sure to be a hit with your kids!  While all of these ideas work on real pumpkins, sometimes we like to use craft pumpkins so our creations will last a little longer. There are so many creative ways to DIY your pumpkins that you can do weekly pumpkin crafts with your kids until Halloween! The most important thing is to have fun!

pineapple-pumpkin-1

Emoji Pumpkins

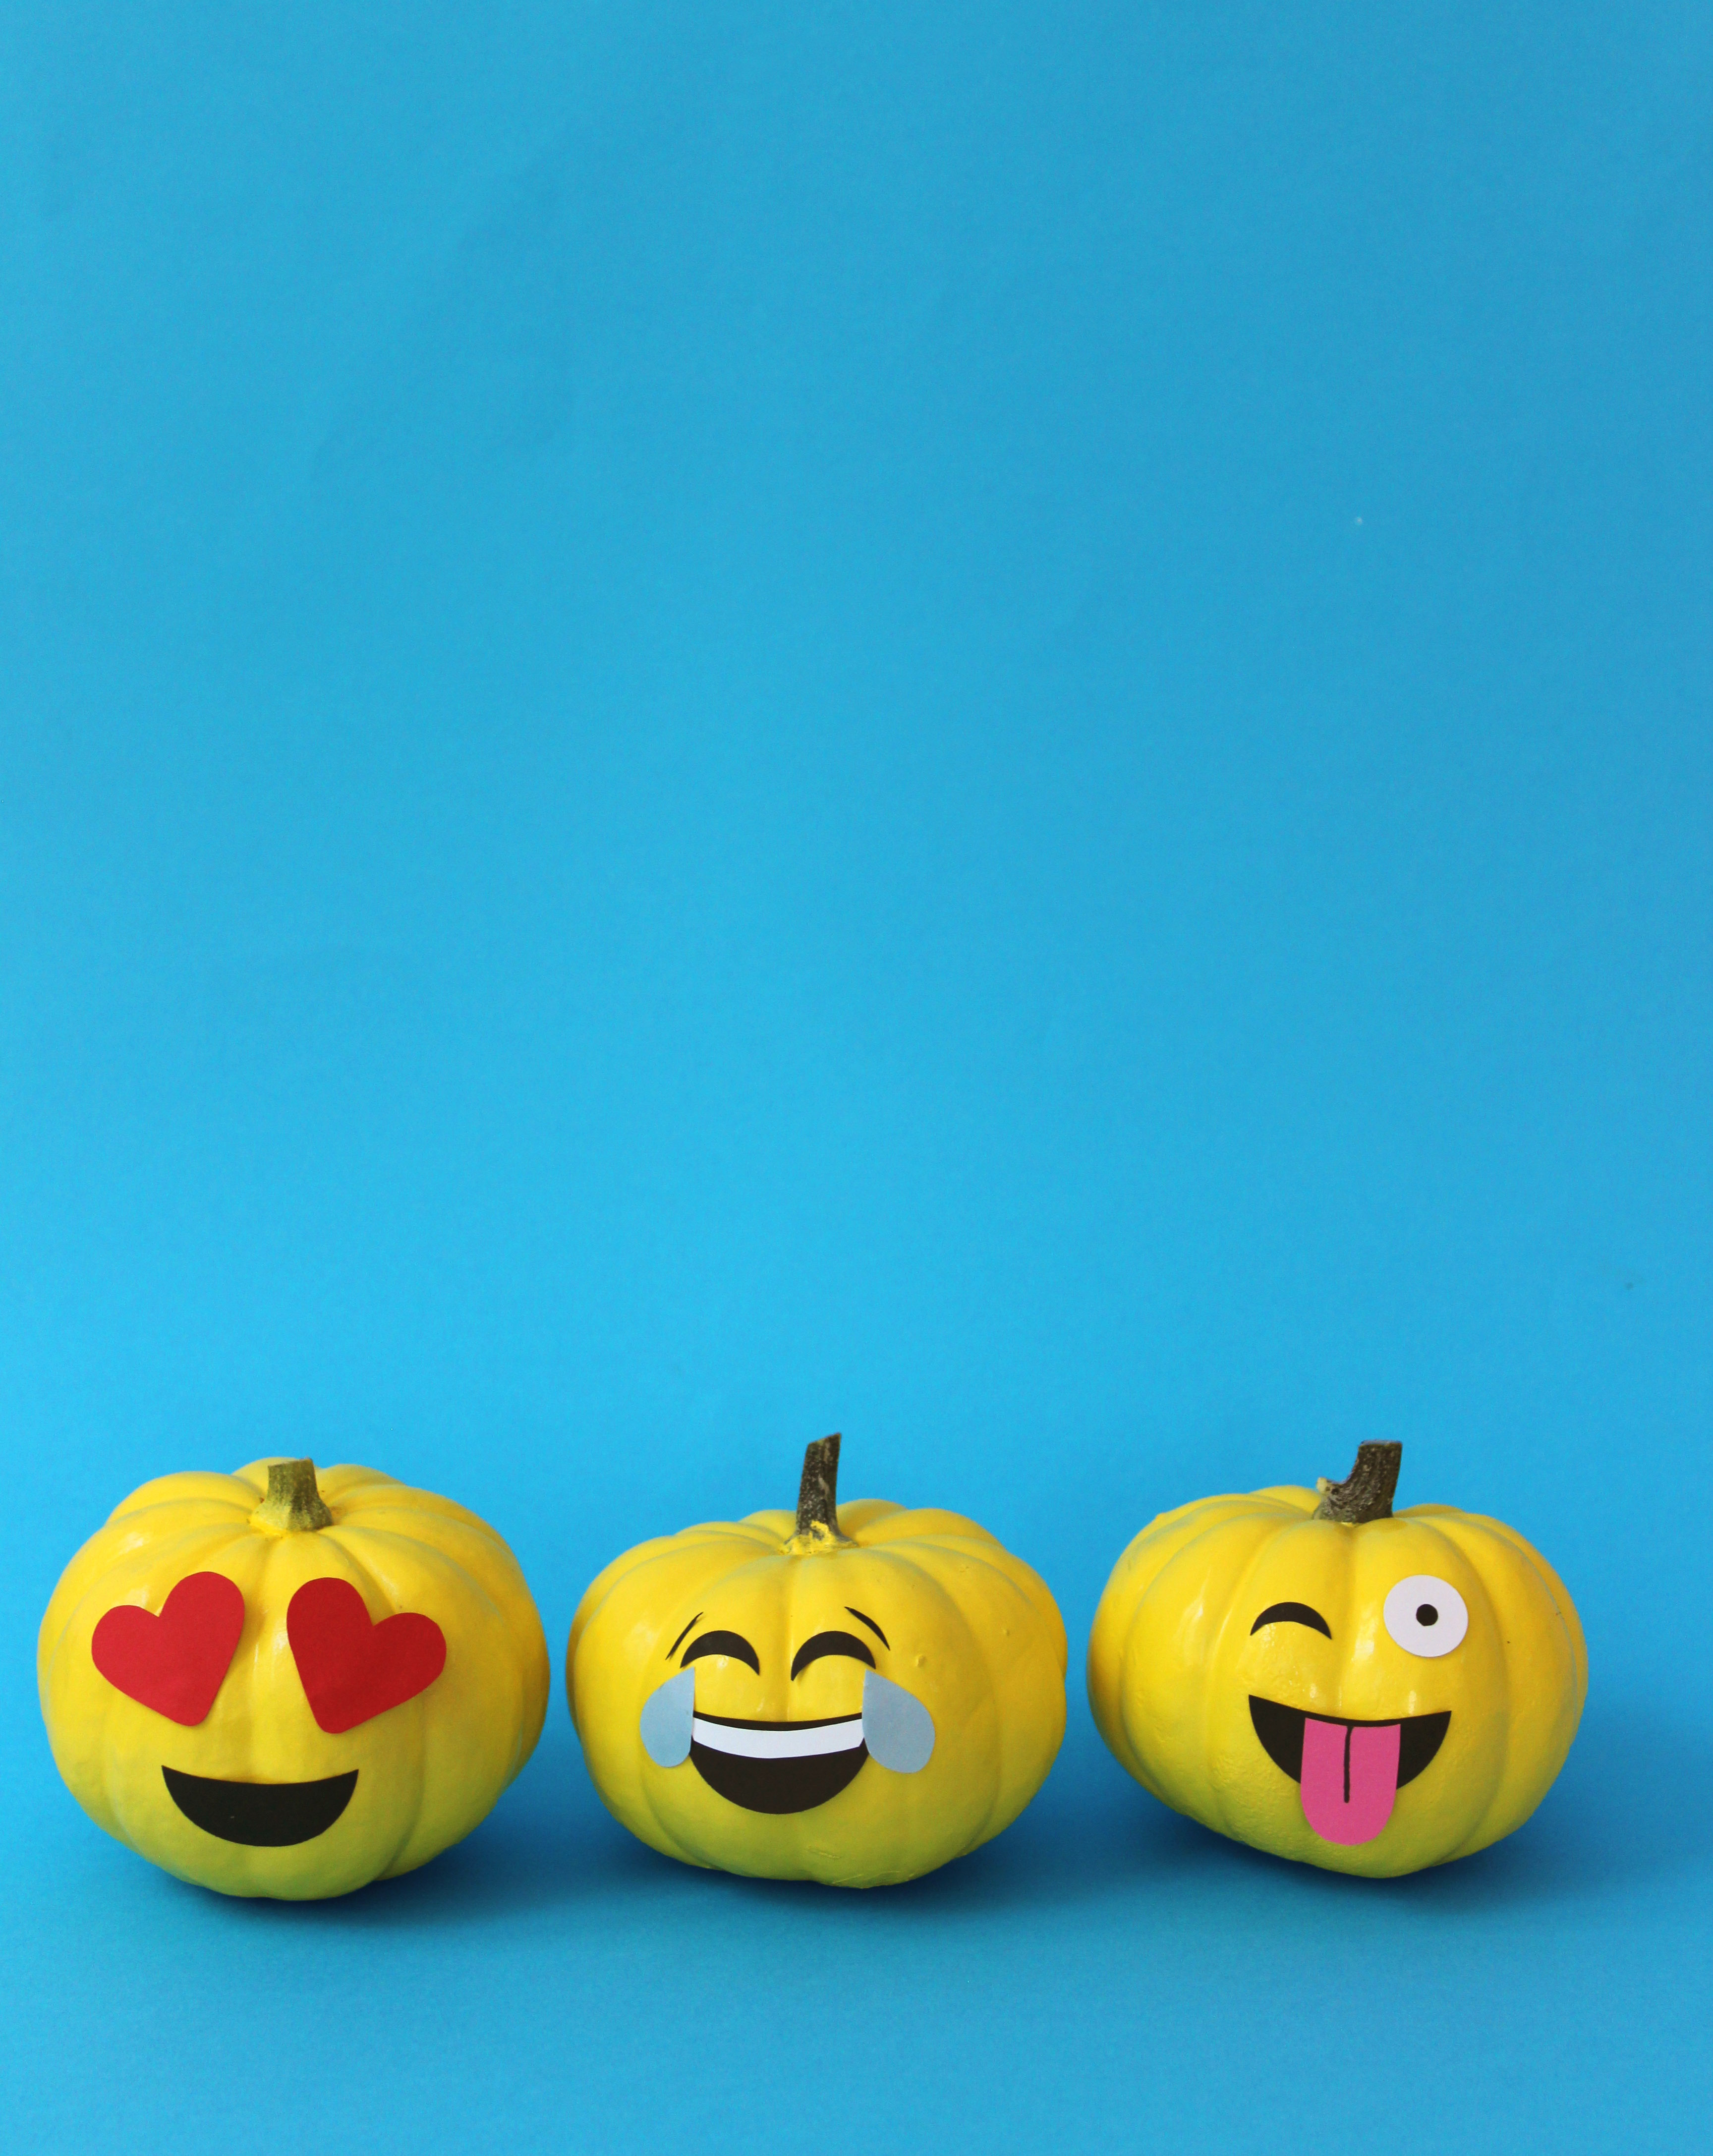
Our kids have a slight obsession with emoji’s right now so it was only fitting that we created emoji pumpkins. First paint your pumpkins yellow with craft paint or spray paint in stages, letting it dry before you to turn them over. Cover the stem with painter’s tape if you do not not want it to to be yellow. While the pumpkins dry, cut out your emoji faces out of construction paper and attach the pieces with glue dots. We made most of our faces with circle punches and heart punches. There are so many possibilities with emoji pumpkins and they are sure to make you smile!

emoji-pumpkins-1

Splatter Paint Pumpkins

We love splatter paint! Splatter painting pumpkins is super easy and really fun for kids. Splatter paint shows up best on white pumpkins, but use any color of pumpkins and paints that you like. Use a medium size, fluffy paint brush and cover it heavily in paint. Next hit the paint brush over your pointer finger and let the paint splatter all over the pumpkins without touching the brush to the pumpkin. With a clean brush, switch colors and repeat the process. Once you have made it through all the colors, let the paint dry. Once the paint is dry, flip the pumpkins over and splatter paint on the other side.

splatter-pumpkins-5

splatter-pumpkins-4

Decoupage Pumpkins

We love decoupaging pumpkins because it is so simple and the possibilities for color and design are endless! It also lasts a very long time…in fact we have decoupage pumpkins from last year that we’ve brought out again. Start with a faux pumpkin, some Mod Podge and a brush. Have your kids cut out fun shapes from colored paper using scissors or hole punches, hold the shapes on the pumpkin and paint a thick layer of Mod Podge over the paper and pumpkin. Once the pumpkin is dry, paint a second coat on the pumpkin, let it dry again and you’re finished.

decoupage

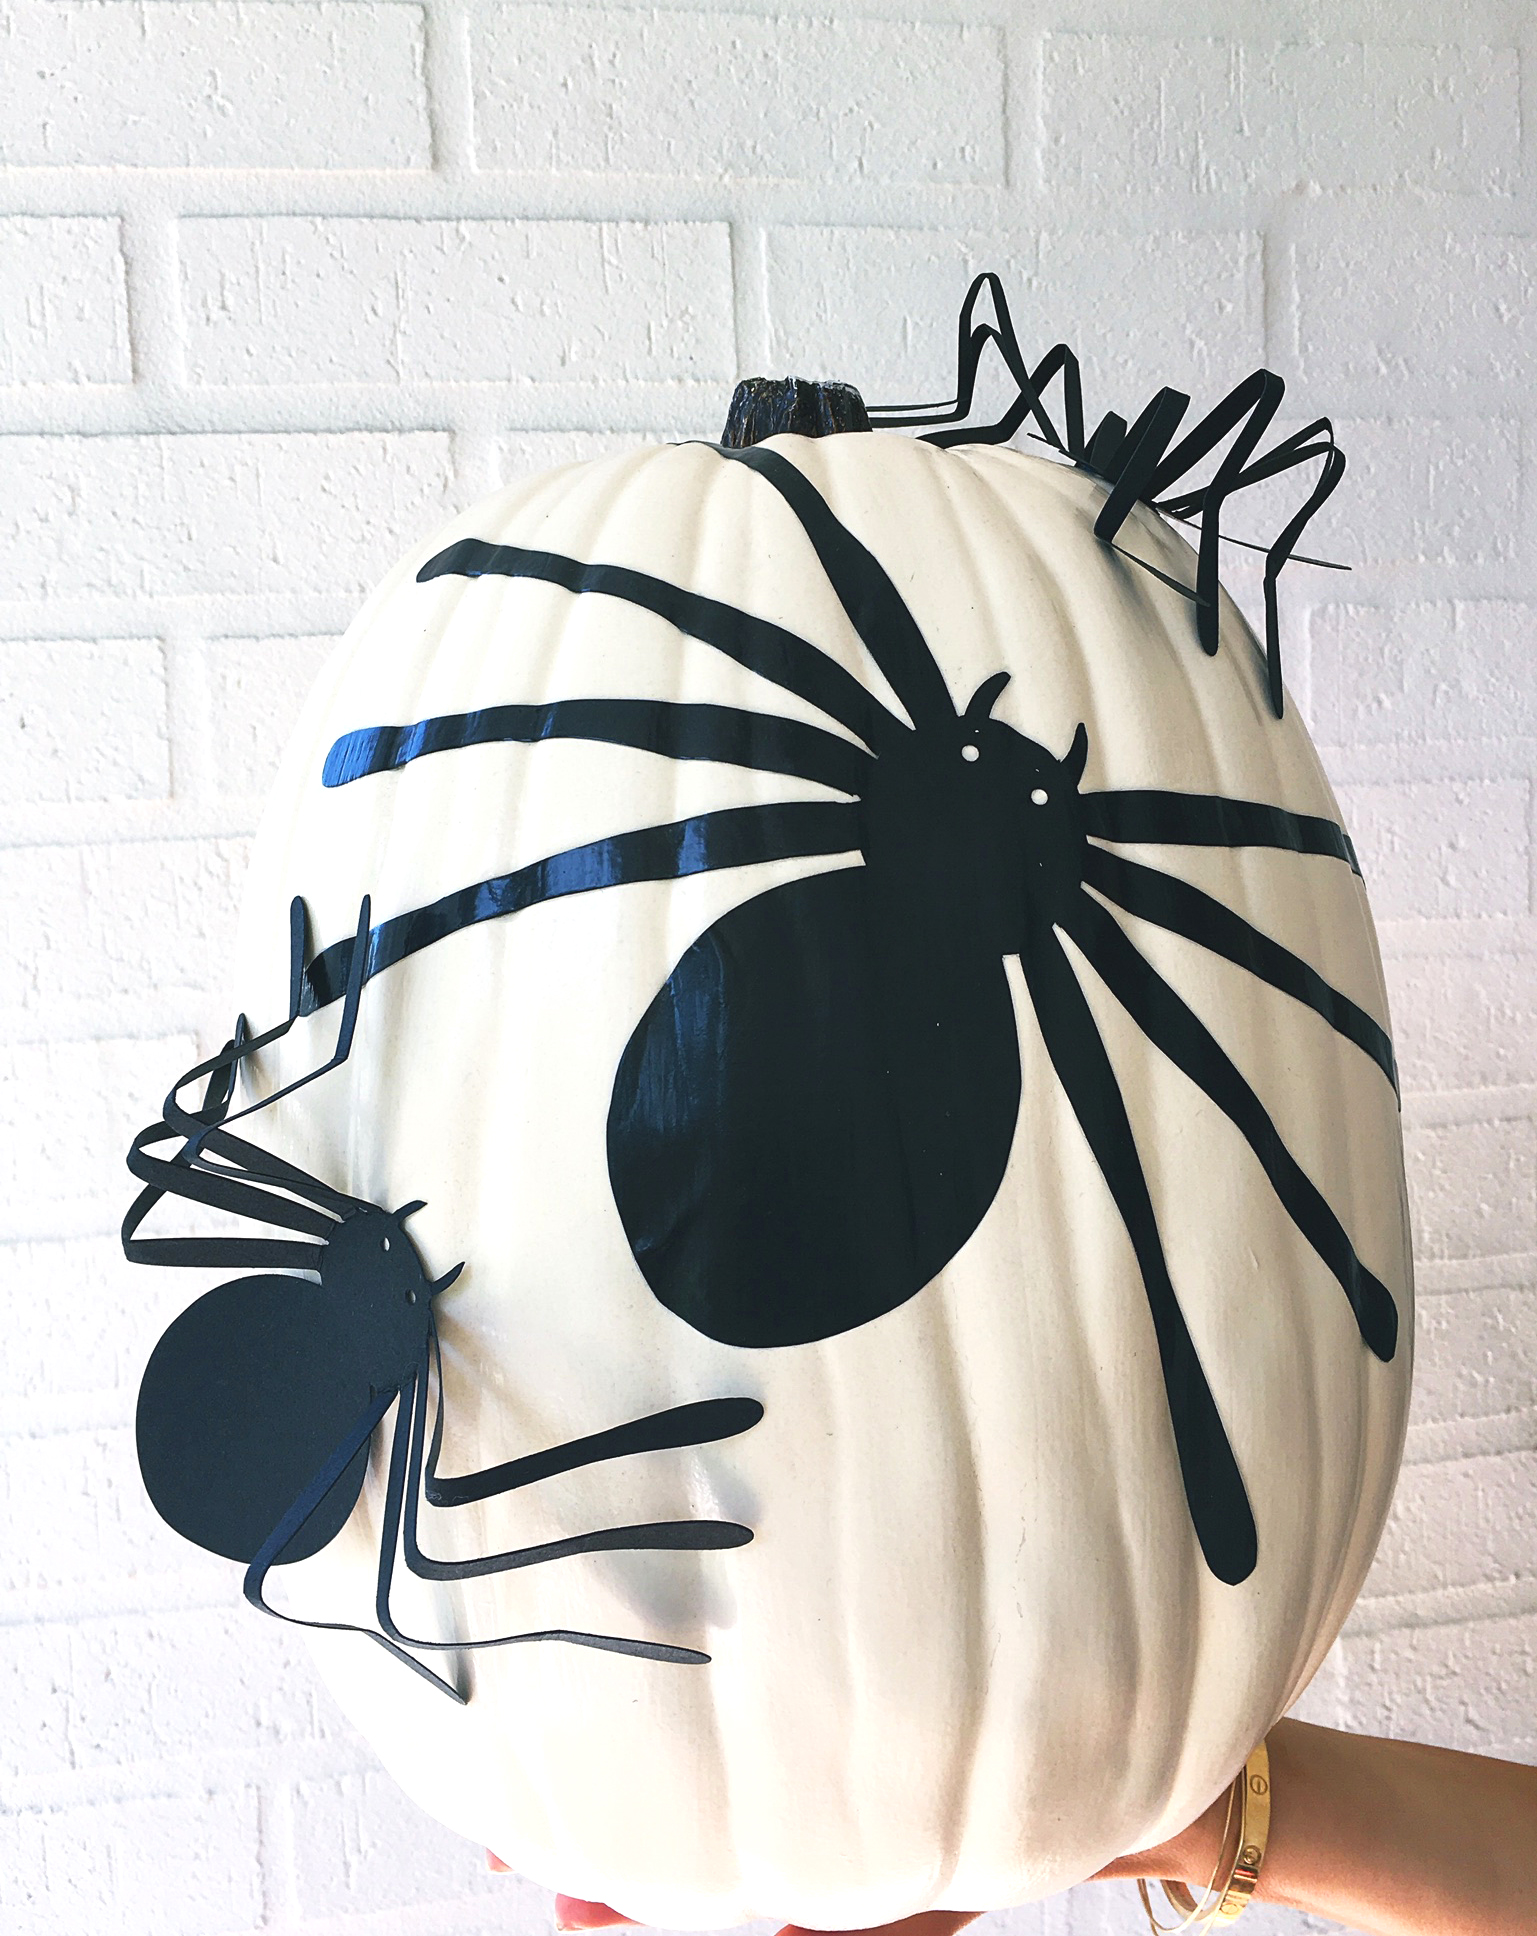
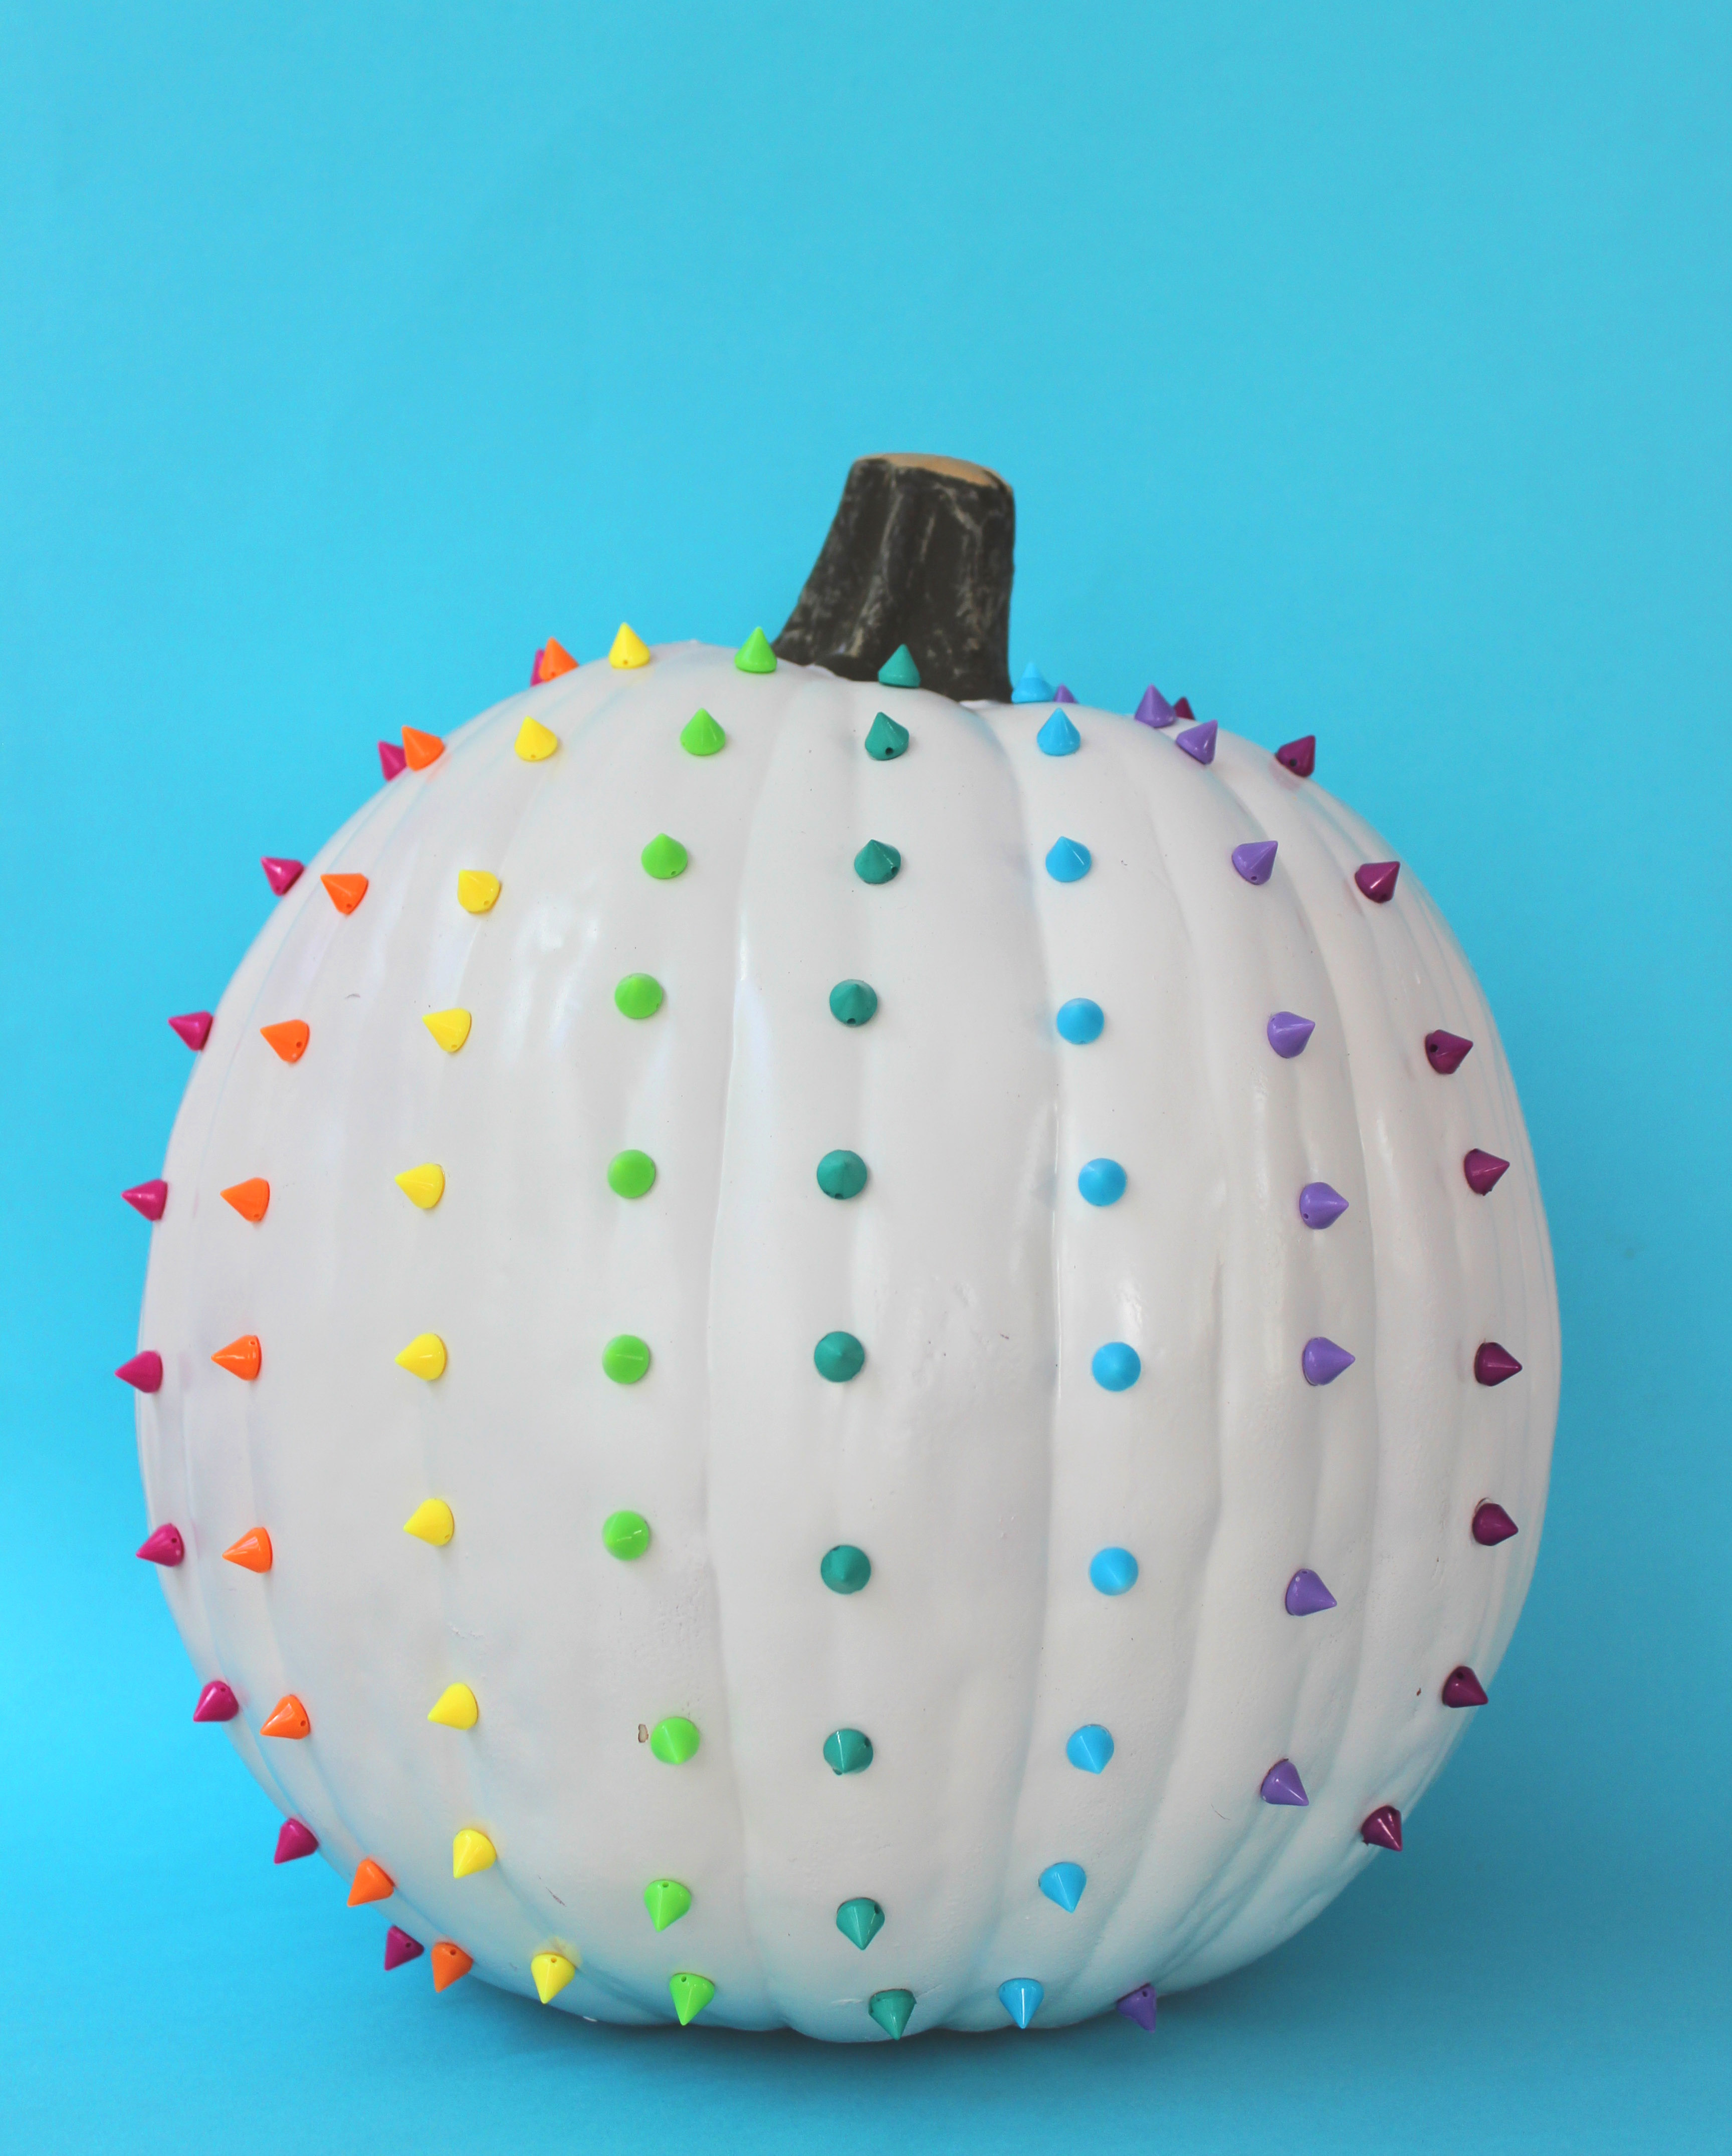
Pumpkin Decorating Kits

There are so many cute pumpkin decorating kits out there that make the whole process so much easier. We made the Flamingo Pumpkin, a Pineapple Pumpkin, and the Spikey Pumpkins from Target. We also loved the Dinosaur, the BB8 Pumpkin and the Darth Vader Pumpkin. Most of these kits come with paint, but we found it easier to spray paint the pumpkin before we decorated it.

spike-pumpkin-1

flamingo-pumpkin-1

Happy Crafting!

jane-can-heart-logo.jpg

Hallman + Ashley

colorful pumpkins

IMG_8451

Pumpkins are the perfect canvas for crafting! There are so many fun ways to decorate pumpkins, almost as many as decorating Easter eggs. Last year, we focused on carve free pumpkin decorating, so this year we decided to go crazy with color!

Color Block Pumpkins

IMG_5576

Pumpkins are really fun to paint. For the most vivid colors it is best to use white pumpkins or white craft pumpkins. You can also paint a layer of white paint on the pumpkins before you add color. For a smooth finish, spray paint is best, but acrylic paint is more fun for kids. To make a color block pumpkin, cover part of the pumpkin in painter’s tape making any design you would like. Next, spray paint the exposed part of the pumpkin. You may need to paint more than one coat. Let the paint dry a bit and remove the tape.

Confetti Pumpkin

IMG_5409

Confetti pumpkins are super easy to make and really fun for kids. Cover all or part of the pumpkin in glue with a foam brush. Sprinkle the pumpkin with confetti and let it dry. Once the glue has dried shake off the excess confetti. We used Knot & Bow’s tiny rainbow confetti, but it would also be fun to use Knot & Bow’s large party confetti.

Painted Pumpkins

IMG_5641

There are a million ways to paint a pumpkin, but we could not pick a color, so we painted a few in every color! These pumpkins were painted with spray paint, but if your little kids want to get in on the action we recommend using acrylic paint. If your kids are doing the painting, tape up the stem so they can hold it while the paint they pumpkin. We recommend painting the pumpkins outside on a drop cloth in paint clothes because this can definitely get messy!

Brushstroke Pumpkins

IMG_5533

A brushstroke pumpkin is also a colorful way to decorate a pumpkin. Buy a white pumpkin or white craft pumpkin and pick 5-7 of your favorite paint colors. Paint random little brushstrokes all over the pumpkin. If your kids are involved with the painting, you could also cut little pieces of sponges and paint the pumpkins the same way we did our rainbow pots for St. Patrick’s Day.

There is no wrong way to decorate a pumpkin. Have fun with it and get creative!

Happy decorating!

jane-can-heart-logo.jpg

Hallman + Ashley

carve-free pumpkin decorating ideas

sticker-pumpkins

We LOVE Halloween! I think one of the best things about being a parent is sharing holidays with your kids. I don’t know about you, but the first Halloween as a parent was so exciting. I had a vision about how it was going to go, but I quickly realized that many of my favorite Halloween activities were not going to work for a baby or even a toddler. Carving pumpkins with knives is one of those activities!

Even now, our kids cannot fully participate in pumpkin carving so we came up with some “carve-free” ways to decorate pumpkins.

Hat & Mustache Pumpkins

We got foam hats from Michael’s and mustaches from Target and let the kids go to town. This option is so simple and so fun for the kids. We call these our “village people” pumpkins.

Hat-mustache-pumpkin

Sticker Pumpkins

There are so many great face stickers and pumpkin stickers out there. We bought a pack of face stickers from Michael’s and neon mustaches from Target. The kids really had fun creating their pumpkins.

sticker-pumpkins

Wooden Pumpkin Decorating Kit

Last year, I ordered a wooden pumpkin decorating kit from Hearthsong (also available on Amazon). It came with 5 different characters. The kids picked the character they wanted and we made holes for them with a screwdriver. Then the kids put the face pieces in the pumpkin. It is like a Mr. Potato Head for pumpkins.

wooden-face-pumpkin

wooden-pumpkin-decorating-kit

Glitter Pumpkin

Glitter pumpkins can be as simple or as complicated as you want them to be. Warning: this is going to be messy, so it’s definitely an outside activity. The kiddos can write or draw a design in glue using a foam brush and then pour on the glitter.  You’ll want to use a foam brush so you don’t ruin a paint brush with the glue. However, if you are making a precise design you will want to use a clean, dry paint brush to dust away the access glitter once you are finished. Ashley painted a jack-o-lantern face on the pumpkin that is so cute!

glitter-pumpkin

Chalkboard Pumpkin

We applied chalkboard paint on a mini pumpkin. The pumpkin needed three coats of paint and 24 hours to set. Once the paint is dry, give your kids some chalk and let them draw on the pumpkin. We found that the sidewalk chalk we had laying around worked really well, and provided lots of entertainment because the kids could draw, erase and draw again!

IMG_4320


For more decorating ideas, check out our bring out your pumpkins! post.

Happy Decorating!

jane-can-heart-logo

Hallman